Committing your changes to TMG
or Reverting to the original
Updated on 13 Dec 2008
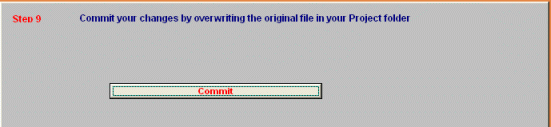
Once you are totally satisfied that you have ALL the correct entries you can press the [Commit] button which will put the whole temporary database to an _I.dbf file.
You will be shown the folder and project file:
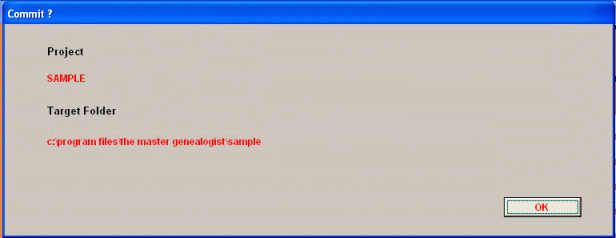
When you have confirmed if they are correct click [OK]
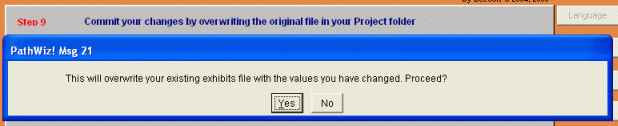
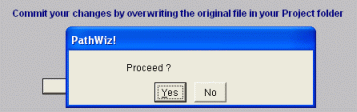
In the next message choose if you wish to proceed, click [Yes] - or if you've changed your mind, click [No]:
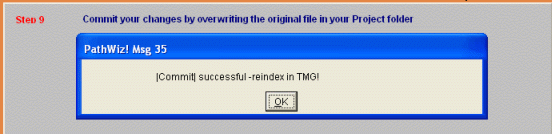
You will be notified if the Commit was successful:
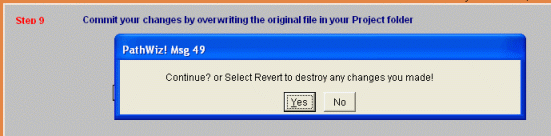
Then you will be asked if you wish to continue:
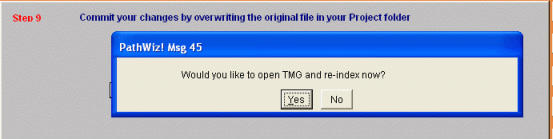
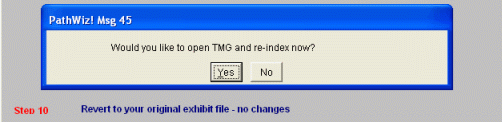
If you have chosen to proceed, as part of [Commit] you can open TMG from within PathWiz! to reindex and view the changed project in TMG
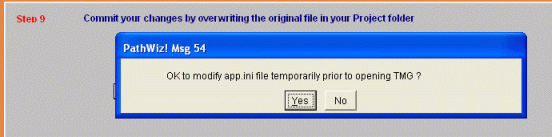
Accepting a temporary change to the app.ini file will allow the project you're working on to be opened in TMG directly (the app.ini file will be reverted to its previous state after TMG has finished and you have closed it again)
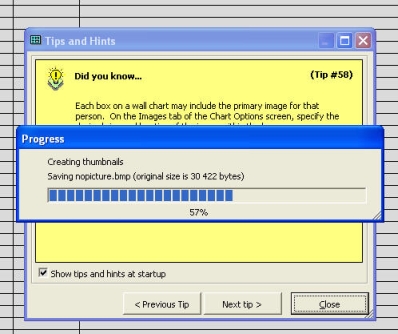
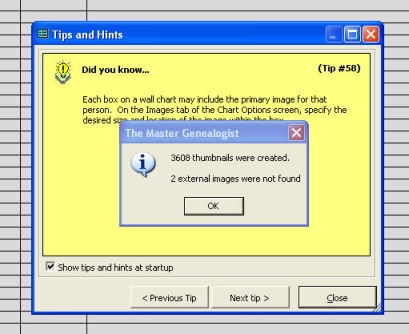
When entering TMG during [Commit] and [Revert] PathWiz! processes it will recreate the indexes and the thumbnails, however you may not see any action whilst the Tips And Hints window is visible - it will take some time to create new thumbnails. You can also manually request a recreate from the right-click menu in the Exhibit Log.
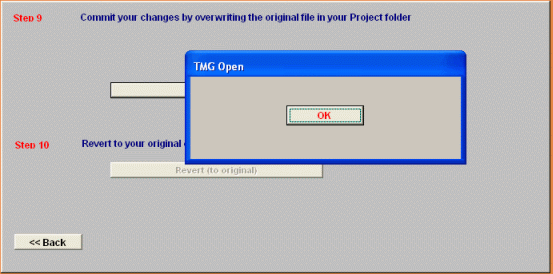
After closing TMG again, click [OK] to revert the app.ini file to its original state:
You may wish to start again on the same or another project.
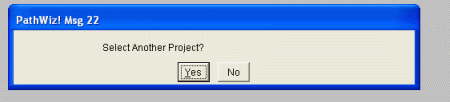
(Note: If you wish to [Revert] your project's exhibit file to its original state in STEP 10, you'll need to click [No])
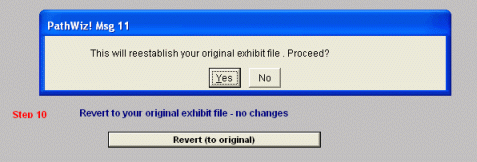
If anything is not as wanted you can press [Revert] to use your
original _I.dbf file again

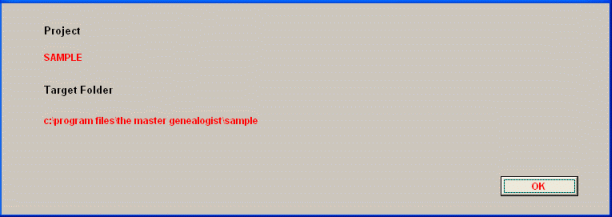
Again you will be shown the Folder and Project:
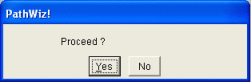
Click [OK], then choose if you wish to proceed:
and if you wish to open the project in TMG for reindexing from within PathWiz! now:

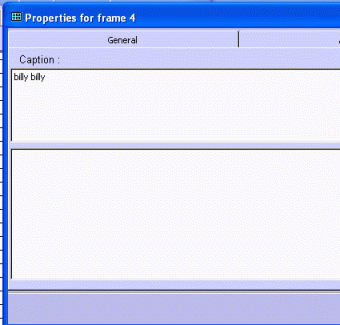
Here we can see the original Caption has been restored (as would all other details in the exhibits file)
Enjoy! - Bryan's BeeSoft ![]()